
Monday, October 30, 2017
A Guy Can Quit
I previously posted an article entitled: "Sometimes a Guy Can't Quit". At the time, I thought I may have done everything I could have done with the photo of the old homestead at Berry Creek. As it turns out, I wasn't done. I added a night sky and put reflections in the windows. I can't think of anything more that could possibly be done, so I think I am finished. Here is the final image.


Saturday, June 17, 2017
Canyonlands National Park
While Canyonlands National Park is relatively close to
Arches National Park, it is much different. In the most popular areas of the
park, you are looking down instead of up as in Arches.
The park has three
distinct areas: the Island in the Sky, The Needles and The Maze.
The Island in the Sky
The Island in the Sky is the most visited area in the Park. Access
to the park is off Highway 191 about 11 miles north of Moab. The turnoff is
clearly marked. It is another 15 miles to the park entrance but much of the
drive is uphill through beautiful red rock canyons. About two miles from the
visitor center you will see the entrance to Dead Horse Canyon State Park. If
you have the time, make sure to visit this park after you tour Canyonlands. If
you need restrooms, it is a much better stop than the Canyonlands visitor center.
The Island in the Sky
offers amazing views of the canyons formed by the Colorado and Green Rivers and
if those weren’t enough, the iconic Mesa Arch is only a short walk from the
main road.
The views begin near the visitor’s center with Shafer Canyon
where there are two parking areas.

View of Shafer Canyon from near the Visitor's Center
Many of the viewpoints are along the canyon rim and gorgeous
views are only a few steps away. If you are limited by time, there are three “must
see” views in the Island in the Sky. In my view the Green River Overlook is the most spectacular of all
the views in the Island in the Sky. It is impossible to describe. That’s why I’ve
included the panoramic photo I made from there. There is a large parking lot by
the viewpoint and a short walk will have you enjoying the view in no time.

The Green River Overlook offers the best views in the Island in the Sky
The Grand View Point Overlook is the other “must see” stop
in the Island in the Sky. It is located at the end of the road. It is not
spectacular but it gives you a view of The Maze and you can just see the spires
in The Needles. There nice parking area at this viewpoint and you can hike
along the rim if you wish.

The Grand View Overlook
Mesa Arch must be the most photographed landmark in
Canyonlands, and for good reason. The Arch is relatively small compared to many
of its cousins in Arches but the fact that the rising sun lights the underside
of the arch has photographers standing elbow to elbow at sunrise. You don’t
have to see the arch as sunrise. It is a great spot anytime and later in the
day the front side of the arch is lighted as are some of the more distant
landmarks like the “Washer Woman”.
The parking lot at Mesa Arch is relatively small given the number of visitors to the arch so finding a parking place may be difficult. Keep that in mind. The hike to the arch is about a quarter mile. When you reach the trailhead, you can go to the right or to the left. The trail to the right takes you up and over the hill while the one on the left circumnavigates the hill. Neither is difficult, but the one on the left is easier.
The parking lot at Mesa Arch is relatively small given the number of visitors to the arch so finding a parking place may be difficult. Keep that in mind. The hike to the arch is about a quarter mile. When you reach the trailhead, you can go to the right or to the left. The trail to the right takes you up and over the hill while the one on the left circumnavigates the hill. Neither is difficult, but the one on the left is easier.

Mesa Arch at Sunrise
If you have the time, I recommend that you rent a Jeep in
Moab and drive the Shafer Trail. The entrance to the trail is near the visitor
center. The exit is along the Colorado River at Potash. Most of the trail is a
reasonably well maintained gravel road. There is one place where the trail is
on slick rock and crosses a dry stream bed. Navigating the trail should be no
problem unless there are heavy rains in the area. You will find beautiful views
here like this one of the bend in the Colorado below Dead Horse Point State
Park:

Colorado River along the Shafer Trail
Needles District
The Needles District of the Park is located 40 miles south
of Moab. Take Highway 191 to Highway 211 to access the Park. The first several
miles of 211 are not very interesting but that changes as you get closer to the
park. Before you arrive at the Park, you will be greeted by this butte:

Near the entrance to the Needles District of Canyonlands National Park
Unlike the canyon views from the Island in the Sky, The
Needles is loaded with beautiful rock monoliths and other rock formations. Unfortunately,
those spires are still some distance from the paved road as illustrated by this
photo that I made from one of the viewing areas:

Distant spires in Canyonlands National Park
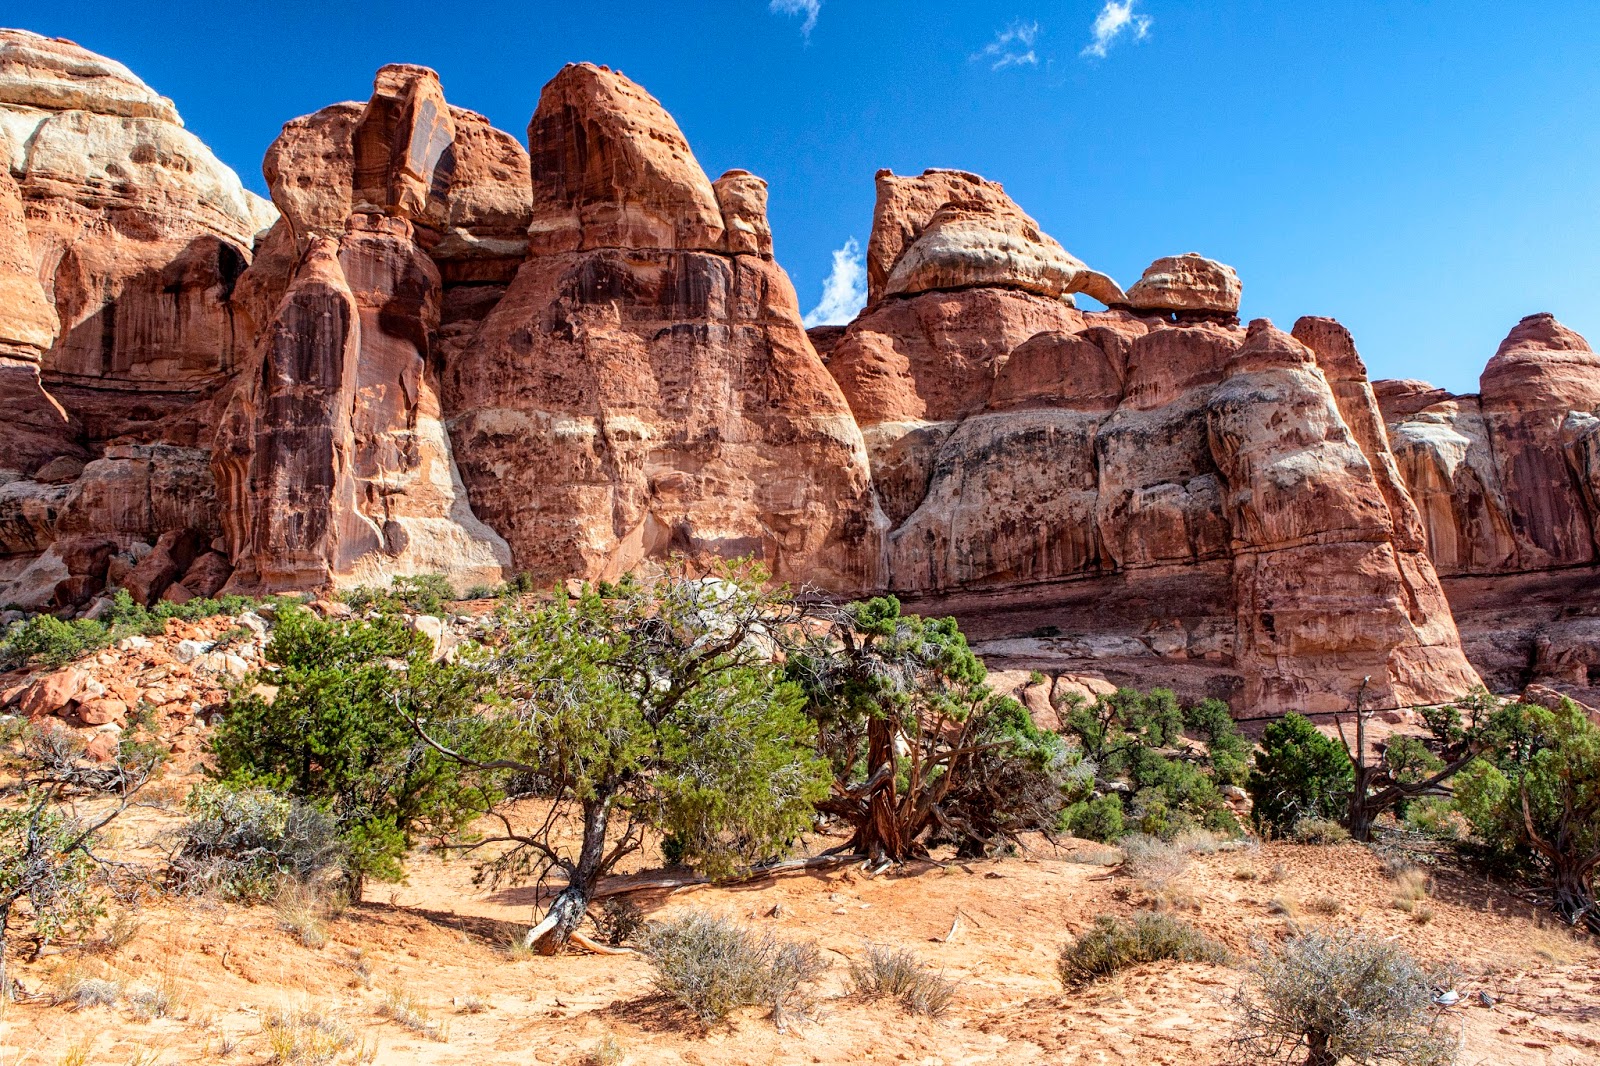
To see the needles close-up, you should hike the Elephant
Hill Trail to Chesler Park. This six mile round trip hike that leads you
through some extraordinarily scenic places to Chesler Park, a basin surrounded
by red rock spires. The round trip hike will take 4 – 6 hours so be prepared.
Good hiking boots are essential as you will be walking on slick rock most of
the time and there are plenty of ups and downs on this hike. Take plenty of water. The views along the way
and those at Chesler Park make the hike well worthwhile. When you arrive at
Chesler Park, make sure you find a place to sit and enjoy your surroundings.

Rock Formations Along the Elephant Hill Trail

Rock Formations Along the Elephant Hill Trail
Chesler Park
The Maze
The Maze is only accessible via 4-wheel drive vehicle or by hiking. I've never been there so I can't comment.
Monday, May 15, 2017
Sometimes a Guy just can't Quit
I made this rather mundane photo of the old homestead at Berry
Springs Park near Georgetown, Texas.

Ordinarily I would just chalk this one up
as a lost cause but this time I thought it might be interesting to turn it into
a night photo, so I made adjustments in Photoshop to make it look like a night
shot. Then I thought I should do some digital restoration and add some light to
make it look lived in.
Light may make it look lived in but furniture and pictures on
the wall seemed like a good idea to really make it look like someone lived there. I decided
that the furniture should be something that would be found in an old homestead
and decided that everything should be wood and the light source should be an
old kerosene lamp. In keeping with the era, the photos on the wall needed to be
in black and white. I took a couple of my photos, converted them to black and
white and put them on the wall. The one in the room with the lamp is actually a
photo of the homestead I made from the back.
To make it a bit more “rural”, I decided to add an old wagon
wheel from photo I made in west Texas. Then I decided to dress up one of the
windows by adding an image of a skylight window I
made at the courthouse in Waco. I thought I was done but as I was going through
some other photos, I thought I should add an old truck that I photographed in
Walburg, Texas. I processed that photo to fit in. The problem though is that
this 1958 Chevy truck wasn’t around in the early days of this homestead. I got
to thinking that in west Texas, there are still a lot of ranch houses without
water and electricity so the truck would fit.
At one point, I put a moon in
the sky but it was too bright and actually detracted from the image, so I took
it out.

Wednesday, May 3, 2017
270 Degree View
When we visited Big Bend National Park in west Texas, I
found this old panel truck near Terlinqua.

I struggled with how to make an interesting photo of this
subject. The sun was high, the sky was clear and I couldn’t come up with a way
to turn it into an interesting photo, so I made shots from different positions
all around it. In my post processing, I tried many different approaches but
found nothing that I liked. As I thought about what to do that would be
creative, I thought of Picasso who showed the front and side view in the same
painting. With that in mind, I set out to combine images of the side and front
of this truck into a single image. I was so pleased with the result that I
decided to include the rear of the truck. Ultimately I produced a 270 degree
view of the truck in a single image. While I was doing all my photoshopping, I
decided to replace the sky with something a little more interesting.
Here’s the final result.

"Killing Time"
I recently joined a photography club. The club's “creative” special
interest group issued a monthly challenge with the subject “clocks”. I had only a couple of days to meet the
challenge if I was to show an image at the SIG meeting. I really didn’t know
how to make a creative photo of a clock so I decided to start by making a photo
of a clock we had on the wall. It was a traditional clock with traditional numbers
that we had purchased at Wal-mart for less than five dollars. Clearly, I couldn’t
make a creative image of that clock in the camera so I relied on Photoshop to
help with the creative piece.
My first idea was to liquefy it. Salvador Dali, the famous
Spanish artist had done that so I used Photoshop’s “puppet warp” tool to squash
it up a bit. That seemed like a good start but I needed to do more than that. Then
I came up with the theme of “killing time” so I decided to create a clock image
with that title, complete with bullet holes and blood drippings. This is the
final image.

Thursday, July 28, 2016
Photo Stacking to Capture the Light.
When I set up my camera and tripod in anticipation of making
a photograph of this beautiful valley in Iceland, I hoped for something better
than I ended up with. The sky was mostly cloudy but the sun would peek out
through an occasional break in the clouds. As portions of the valley lit up, I
would make an exposure; all the time hoping the sun would light up the mountain
at the end of the valley and that a blue hole would open behind it. Unfortunately,
the sky simply did not cooperate and this was one of the photos I was able to make.

While this photo is acceptable, it wasn’t what I was looking
for.
Before I packed it in, I raised my camera, and using a wide angle lens, captured the
scene with the blue hole that was high in the sky. That photo wasn't very good because the blue sky wasn’t where I wanted it in
the frame, it had too much sky and the valley was completely shaded.
As I made my photographs, I was thinking about whether I
could make the shot I wanted in my post processing by combining the images that
I had made.
When I got home I gave it a try. First, in Adobe Camera Raw,
I opened twelve images I had made of the valley; all with different places lit
by the sun. I made my adjustments,made sure that I had selected all the
images and applied the adjustments to all of them. I then clicked on the “Done”
button. With those same images selected in ACR, I clicked on Tools, Photoshop, Load Files into Photoshop Layers. When all the files were
opened, I selected all the layers and changed the blending mode to “Lighten”.
By changing the blending mode, all the lightest pixels were exposed so the entire
valley was lit up. I liked the final product much better, but all the shadows
were now lost. I then clicked on the eyeball next to each layer to see what it
was contributing to the entire image. By turning off some of the layers, I was
able to bring some of the shadows back into the image. When I found the
combination I liked, I flattened the image and the result was much better than
the original. Still I wasn’t satisfied.
In ACR, I opened the final photograph I made; the one with the
bit of blue sky. I applied the same settings as I had made for the other images
and opened it in Photoshop. Next I duplicated the layer by pressing CTRL
J. I then clicked on Window, Arrange,, Tile All Vertically. Now I
could see my two images side by side. I took the Move Tool, grabbed the top
layer of the image with the blue sky and dragged it to the other image. While
holding down the Shift key, I dropped the layer on top of the other image.
Holding Shift ensures that the two images are aligned on top of each other
perfectly. With the blue hole image on top, I went to the bottom of the Layers
Pallet and while holding down the ALT key, I clicked on the Add a Layer Mask
icon. Holding down the ALT key created a black mask that hid the entire layer.
Next I clicked on the background layer and using the Quick Selection Tool, I
selected the sky. I then selected the blue hole layer mask and hit the DELETE key. That painted the mask white in the selected
area and revealed the blue hole layer in the selected area. The blue hole was perfectly placed. (If it had not been where I wanted it, I would have used the Move Tool to position the layer in such a way that the blue sky was where I wanted it.)
I then pressed CTL ALT SHIFT E to flatten the layer above the other layers. I converted it to a smart object and applied select filters from Nik's Color Efex Pro 4. I then used Nik's Viveza to make some targeted adjustments to the mountain top, adding the light I had hoped I would get from the sun as well as adding a little saturation.
While I captured the light I wanted via stacking and getting the sky I wanted by compositing the sky from a photo made during the same stop, I still wasn't completely satisfied with my shot. I liked everything about it except the foreground. I thought it needed more or none at all because I thought that what I had was more of a distraction than a photographic element.
I looked through my images and found another one I made at the same location but at a shorter focal length. I was able to move the foreground from that image to my stacked image and it worked well.
While I captured the light I wanted via stacking and getting the sky I wanted by compositing the sky from a photo made during the same stop, I still wasn't completely satisfied with my shot. I liked everything about it except the foreground. I thought it needed more or none at all because I thought that what I had was more of a distraction than a photographic element.
I looked through my images and found another one I made at the same location but at a shorter focal length. I was able to move the foreground from that image to my stacked image and it worked well.
Here is the final result.


This is the image I set out to create. When the sun and sky didn't cooperate, I took what they gave. When my eye didn't capture the best foreground, I inserted the foreground from another image. In the end, I created the image I was after.
Monday, December 14, 2015
What a View!
In 1961, the area which is now known as Julia Pfeiffer Burns State Park was donated to the State of California by the Helen Brown, wife of a former New York Congressman Lathrop Brown. They acquired the property in 1924 and built a stone house along the Big Sur coast.
As I recall the story, Helen was the adopted child of a wealthy family in New York. When they died, she was left with a fortune. She married Brown, moved to California and purchased this property, which was literally in the middle of nowhere. There were few people in the area but Helen and Julia became good friends, so good, in fact, that when Helen donated the property to the State of California, one stipulation was that the land be made into a state park and another was that it be named after her friend Julia.
The Brown's built a home at this location above the ocean. Their home had extraordinary views. This view looks north.

The view looking South was even more magnificent than the other one. An 80' waterfall poured on to the white sand beach with Caribbean blue waters at McWay Cove.

If there is a more beautiful view along the Pacific coast, I haven't seen it and can't imagine how it could be more beautiful than this location.
As I recall the story, Helen was the adopted child of a wealthy family in New York. When they died, she was left with a fortune. She married Brown, moved to California and purchased this property, which was literally in the middle of nowhere. There were few people in the area but Helen and Julia became good friends, so good, in fact, that when Helen donated the property to the State of California, one stipulation was that the land be made into a state park and another was that it be named after her friend Julia.
The Brown's built a home at this location above the ocean. Their home had extraordinary views. This view looks north.

The view looking South was even more magnificent than the other one. An 80' waterfall poured on to the white sand beach with Caribbean blue waters at McWay Cove.

If there is a more beautiful view along the Pacific coast, I haven't seen it and can't imagine how it could be more beautiful than this location.
Subscribe to:
Posts (Atom)