Saturday, March 9, 2019

Easily Remove Halos in Photoshop

I’ve seen several beautiful photos recently that were nearly ruined by the fact that sharpening produced halos around edges where sky met edges. What’s worse, the photographer could have easily removed them in Photoshop. With less than a minute of work, those halos could be gone.

Here’s an example that illustrates what I mean.


I made this photo of a rock climber in Arches National Park. It’s a nice photo but if you zoom in, you will see the halos I’m writing about.

After sharpening the image, I was left with a halo around the edges.

Wouldn’t it be nice if you could simply take the clone stamp, select from the sky and paint the halo out, without affecting the rock? The good news is that’s exactly what you do. To get rid of those halos, (make sure you are working on a flattened or composite of your image) you simply change the blend mode of the clone stamp from Normal to Darken. The Darken blend mode tells Photoshop to replace pixels that are lighter than the selected area with pixels from the selected area BUT, only replace pixels that are lighter than the selected area. So long as the selected area is lighter than the adjacent rock, only the halo will be replaced.


Notice how the halo disappears without leaving any telltale signs on the rock. Brush size doesn’t matter, just make sure that opacity is set to 100%.     
            
Unless you are very careful, your cloning can leave you with areas where the sky doesn’t match properly like in the image below.


To prevent this potential issue, you can use a little different approach to removing halos. Instead of working on a flattened or composited image, add a new layer. Click on the new layer icon at the bottom of the layers palette: 


                                []

Change the blend mode of the layer to Darken and use the clone stamp to eliminate the halo. (It doesn’t matter what the blend mode of the clone tool is.) If you get mismatching sky, fix it using a gaussian blur. Make sure the new layer is selected, click on Filter >> Blur >> Gaussian Blur and apply enough blur to fix the problem. The blur will only be applied to the layer you were working on. It of course, will only have the data from fixing the halo so you won’t cause yourself any other problems with the image.

Halos can ruin an otherwise great photo. Fix them quickly and easily in Photoshop.


Wednesday, December 5, 2018

Photographing a Speeding Train

Photographing a speeding locomotive from the tracks in front of it is dangerous business; too dangerous for me. So, how did I make this photograph? While, not simple, I created a composite using an image of the mountains I had made in Glacier National Park, another with colorful foliage in Alaska, railroad tracks that I photographed in Granger, Texas and a locomotive I photographed in my kitchen. That’s right, I photographed it in my kitchen. You see, my friend Jim Doe creates remarkable models of all kinds of things and he let me use his BNSF locomotive. It is so lifelike that no one would know it isn’t the real thing. I loaded all those images into Photoshop and went to work. This composite was the result. Who would think that the train in this photo is a model? I don’t know. It looks real to me and creating this image was completely safe.


Sunday, May 20, 2018

Turning a Sow's Ear into a Silk Purse


I've heard it said that photographers should just delete any bad images as they come out of the camera. If it isn't good now, they say, it won't get better with time. There is a lot to be said for that, but I keep all my images. I will go through old images once in a while and in doing so, I've uncovered some that I didn't think were keepers at the time. I'm sure I discarded one image of some gannets in New Foundland because the tip of the wing was cropped off. Otherwise it was a really nice image. My Photoshop skills have reached a point where I knew I could recreate the wing tip. So I fixed the wing and printed the photo. It won a second place in a local photo contest.

Sometimes when I look through some of my old photos, a Photoshop idea pops into my head. Look at the four photos below. None of them are "keepers" by themselves, but when I composited them in Photoshop, I think I produced a pretty good "altered reality" image. In fact, I am very pleased with the final image. Scroll down to take a look.


Monday, October 30, 2017

A Guy Can Quit

I previously posted an article entitled: "Sometimes a Guy Can't Quit". At the time, I thought I may have done everything I could have done with the photo of the old homestead at Berry Creek. As it turns out, I wasn't done. I added a night sky and put reflections in the windows. I can't think of anything more that could possibly be done, so I think I am finished. Here is the final image.


Saturday, June 17, 2017

Canyonlands National Park

While Canyonlands National Park is relatively close to Arches National Park, it is much different. In the most popular areas of the park, you are looking down instead of up as in Arches. 

The park has three distinct areas: the Island in the Sky, The Needles and The Maze.

The Island in the Sky

The Island in the Sky is the most visited area in the Park. Access to the park is off Highway 191 about 11 miles north of Moab. The turnoff is clearly marked. It is another 15 miles to the park entrance but much of the drive is uphill through beautiful red rock canyons. About two miles from the visitor center you will see the entrance to Dead Horse Canyon State Park. If you have the time, make sure to visit this park after you tour Canyonlands. If you need restrooms, it is a much better stop than the Canyonlands visitor center.

The Island in the Sky offers amazing views of the canyons formed by the Colorado and Green Rivers and if those weren’t enough, the iconic Mesa Arch is only a short walk from the main road.

The views begin near the visitor’s center with Shafer Canyon where there are two parking areas. 

View of Shafer Canyon from near the Visitor's Center

Many of the viewpoints are along the canyon rim and gorgeous views are only a few steps away. If you are limited by time, there are three “must see” views in the Island in the Sky. In my view the Green River Overlook is the most spectacular of all the views in the Island in the Sky. It is impossible to describe. That’s why I’ve included the panoramic photo I made from there. There is a large parking lot by the viewpoint and a short walk will have you enjoying the view in no time.

The Green River Overlook offers the best views in the Island in the Sky

The Grand View Point Overlook is the other “must see” stop in the Island in the Sky. It is located at the end of the road. It is not spectacular but it gives you a view of The Maze and you can just see the spires in The Needles. There nice parking area at this viewpoint and you can hike along the rim if you wish.

The Grand View Overlook

Mesa Arch must be the most photographed landmark in Canyonlands, and for good reason. The Arch is relatively small compared to many of its cousins in Arches but the fact that the rising sun lights the underside of the arch has photographers standing elbow to elbow at sunrise. You don’t have to see the arch as sunrise. It is a great spot anytime and later in the day the front side of the arch is lighted as are some of the more distant landmarks like the “Washer Woman”.

The parking lot at Mesa Arch is relatively small given the number of visitors to the arch so finding a parking place may be difficult. Keep that in mind. The hike to the arch is about a quarter mile. When you reach the trailhead, you can go to the right or to the left. The trail to the right takes you up and over the hill while the one on the left circumnavigates the hill. Neither is difficult, but the one on the left is easier. 

 Mesa Arch at Sunrise

If you have the time, I recommend that you rent a Jeep in Moab and drive the Shafer Trail. The entrance to the trail is near the visitor center. The exit is along the Colorado River at Potash. Most of the trail is a reasonably well maintained gravel road. There is one place where the trail is on slick rock and crosses a dry stream bed. Navigating the trail should be no problem unless there are heavy rains in the area. You will find beautiful views here like this one of the bend in the Colorado below Dead Horse Point State Park:

Colorado River along the Shafer Trail


Needles District

The Needles District of the Park is located 40 miles south of Moab. Take Highway 191 to Highway 211 to access the Park. The first several miles of 211 are not very interesting but that changes as you get closer to the 
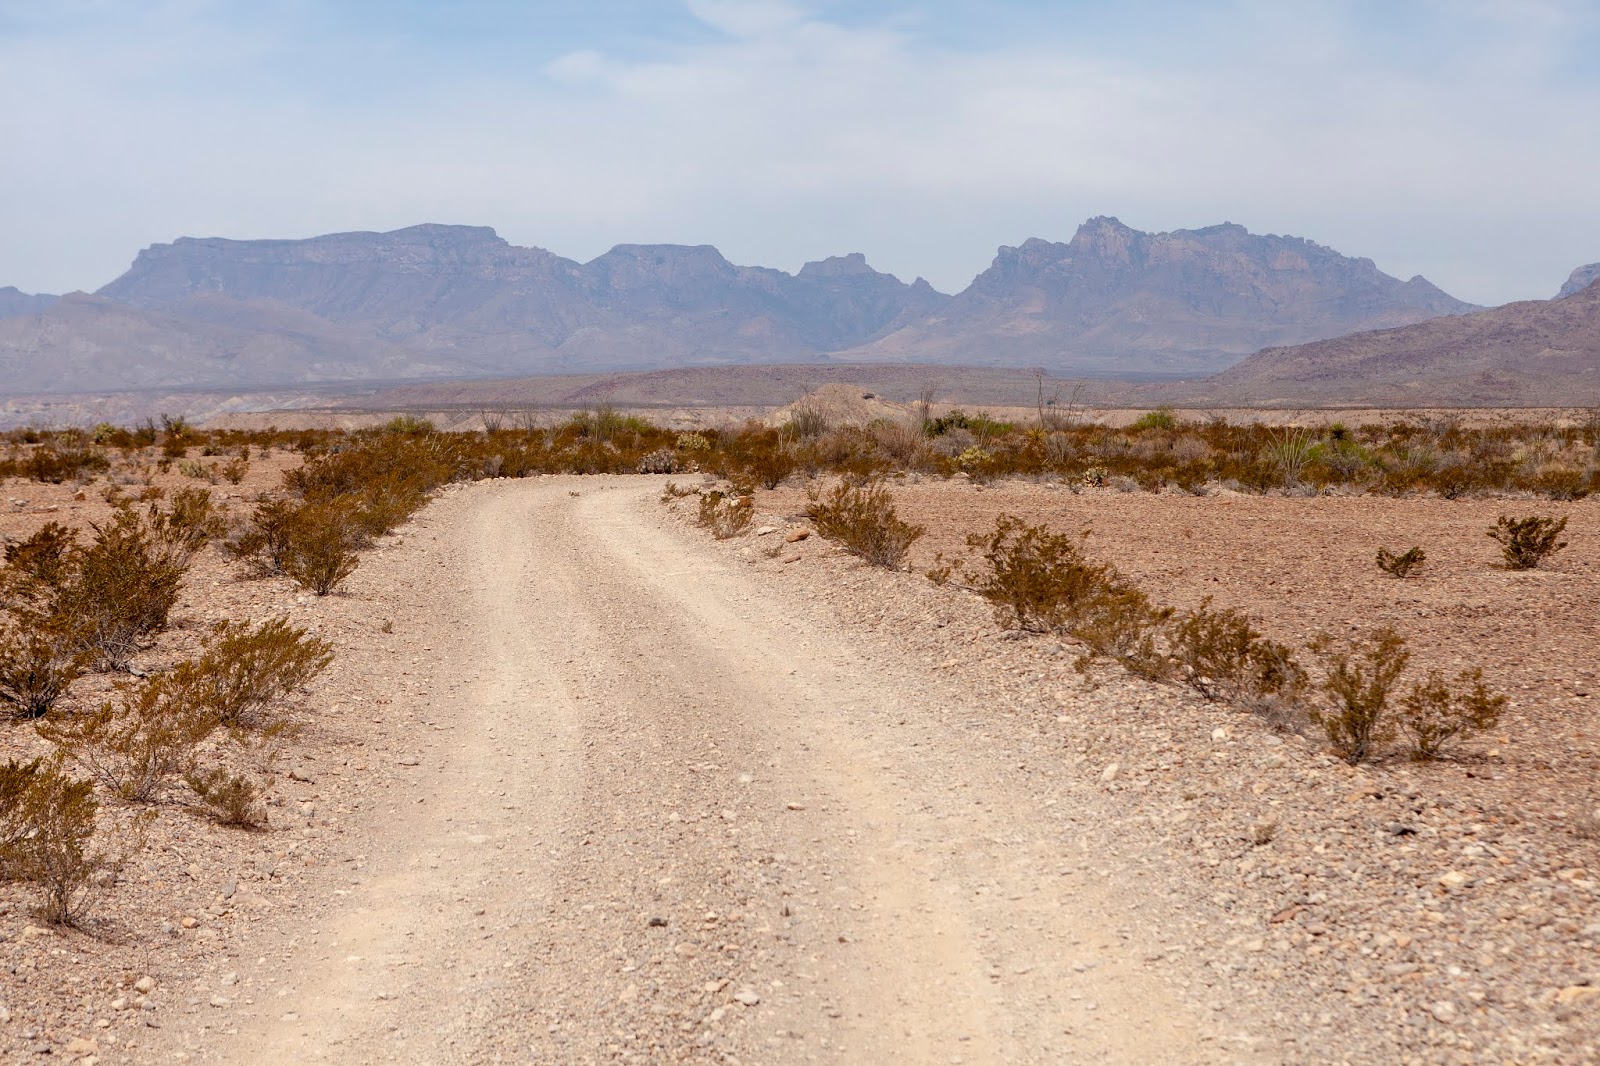
park. Before you arrive at the Park, you will be greeted by this butte:

Near the entrance to the Needles District of Canyonlands National Park

Unlike the canyon views from the Island in the Sky, The Needles is loaded with beautiful rock monoliths and other rock formations. Unfortunately, those spires are still some distance from the paved road as illustrated by this photo that I made from one of the viewing areas:

Distant spires in Canyonlands National Park

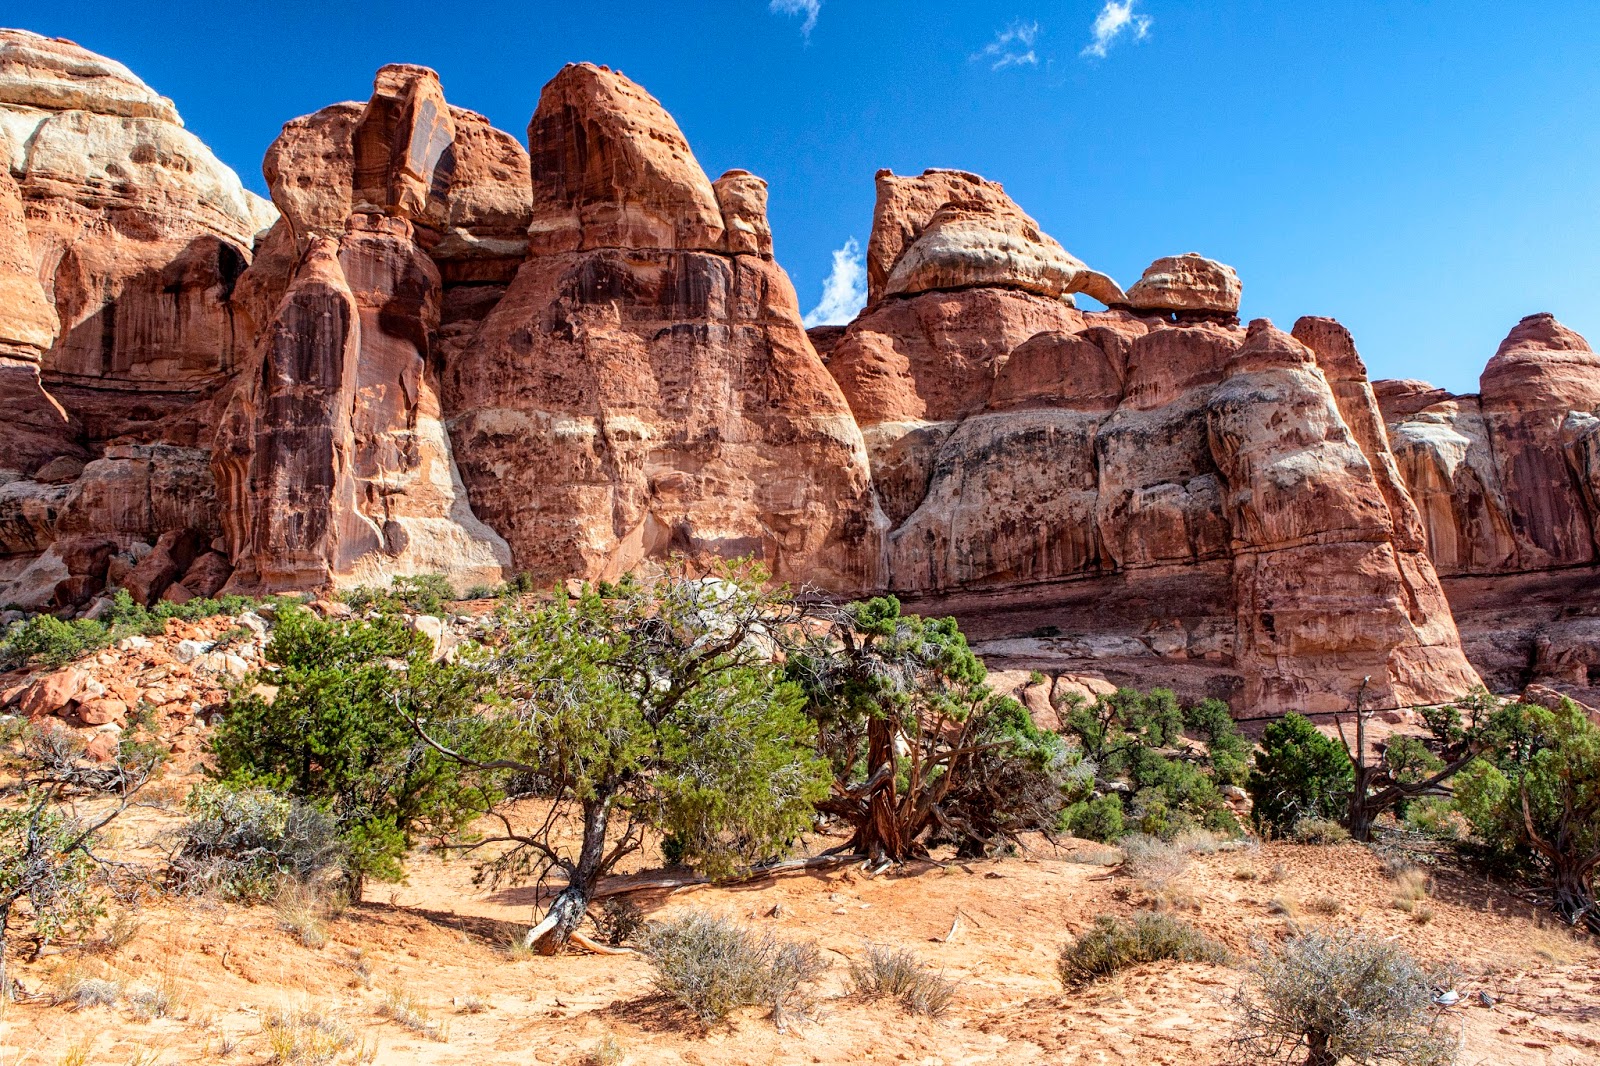
To see the needles close-up, you should hike the Elephant Hill Trail to Chesler Park. This six mile round trip hike that leads you through some extraordinarily scenic places to Chesler Park, a basin surrounded by red rock spires. The round trip hike will take 4 – 6 hours so be prepared. Good hiking boots are essential as you will be walking on slick rock most of the time and there are plenty of ups and downs on this hike.  Take plenty of water. The views along the way and those at Chesler Park make the hike well worthwhile. When you arrive at Chesler Park, make sure you find a place to sit and enjoy your surroundings.

Rock Formations Along the Elephant Hill Trail


Rock Formations Along the Elephant Hill Trail

Chesler Park

The Maze

The Maze is only accessible via 4-wheel drive vehicle or by hiking. I've never been there so I can't comment.

Monday, May 15, 2017

Sometimes a Guy just can't Quit


I made this rather mundane photo of the old homestead at Berry Springs Park near Georgetown, Texas. 


Ordinarily I would just chalk this one up as a lost cause but this time I thought it might be interesting to turn it into a night photo, so I made adjustments in Photoshop to make it look like a night shot. Then I thought I should do some digital restoration and add some light to make it look lived in.

Light may make it look lived in but furniture and pictures on the wall seemed like a good idea to really make it look like someone lived there. I decided that the furniture should be something that would be found in an old homestead and decided that everything should be wood and the light source should be an old kerosene lamp. In keeping with the era, the photos on the wall needed to be in black and white. I took a couple of my photos, converted them to black and white and put them on the wall. The one in the room with the lamp is actually a photo of the homestead I made from the back.

To make it a bit more “rural”, I decided to add an old wagon wheel from photo I made in west Texas. Then I decided to dress up one of the windows by adding an image of a skylight window I made at the courthouse in Waco. I thought I was done but as I was going through some other photos, I thought I should add an old truck that I photographed in Walburg, Texas. I processed that photo to fit in. The problem though is that this 1958 Chevy truck wasn’t around in the early days of this homestead. I got to thinking that in west Texas, there are still a lot of ranch houses without water and electricity so the truck would fit.

At one point, I put a moon in the sky but it was too bright and actually detracted from the image, so I took it out.

Below is the final image. Is this really the final? I don't know. I thought I had a final before I added the truck. It could be the final, but never say never.


Wednesday, May 3, 2017

270 Degree View

When we visited Big Bend National Park in west Texas, I found this old panel truck near Terlinqua.


I struggled with how to make an interesting photo of this subject. The sun was high, the sky was clear and I couldn’t come up with a way to turn it into an interesting photo, so I made shots from different positions all around it. In my post processing, I tried many different approaches but found nothing that I liked. As I thought about what to do that would be creative, I thought of Picasso who showed the front and side view in the same painting. With that in mind, I set out to combine images of the side and front of this truck into a single image. I was so pleased with the result that I decided to include the rear of the truck. Ultimately I produced a 270 degree view of the truck in a single image. While I was doing all my photoshopping, I decided to replace the sky with something a little more interesting.


Here’s the final result.